Here you will find the guide to configure your email Accomazzi on your Android device. The first thing to do is undoubtedly open the app e-mail, then follow the steps below.
If you have never configured any email on this device go to next step, otherwise here is how to get to the same screen.
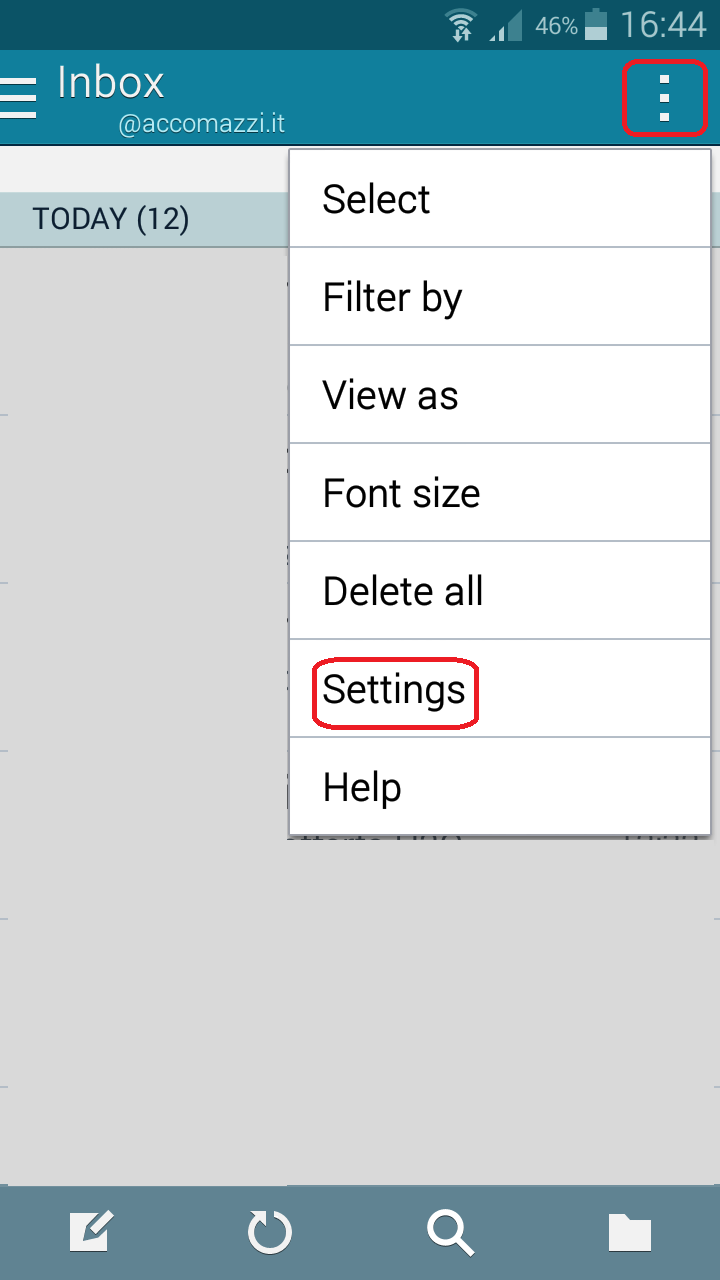
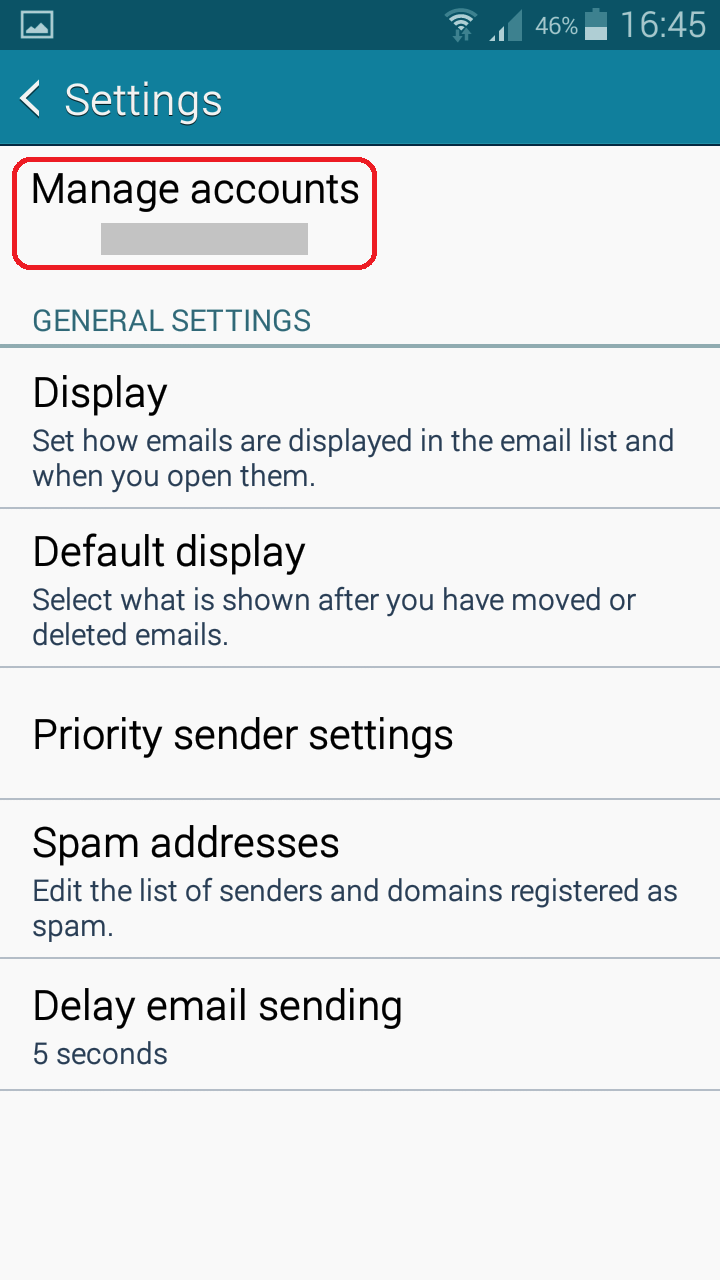
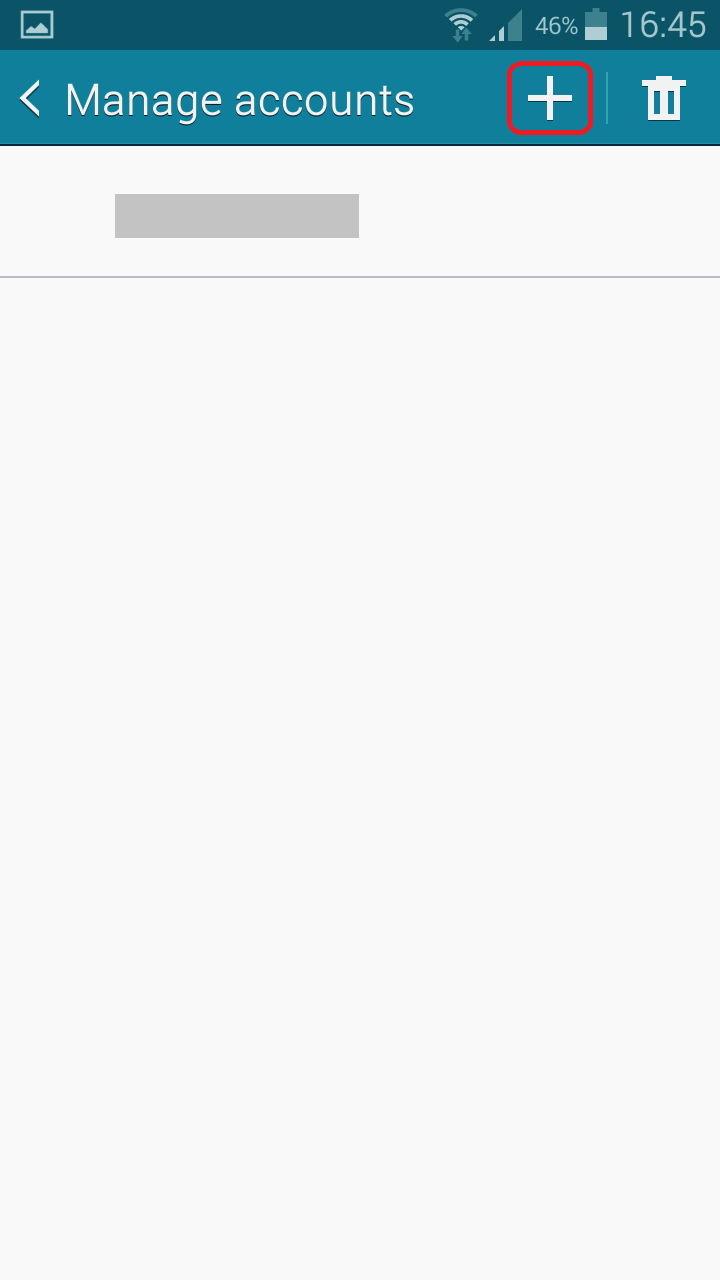
Click the icon in the shape of three dots, then select "Settings", "Manage Accounts" and then on the icon in the shape of "+" that will let you add a new account and synchronize it with the others in the list below.
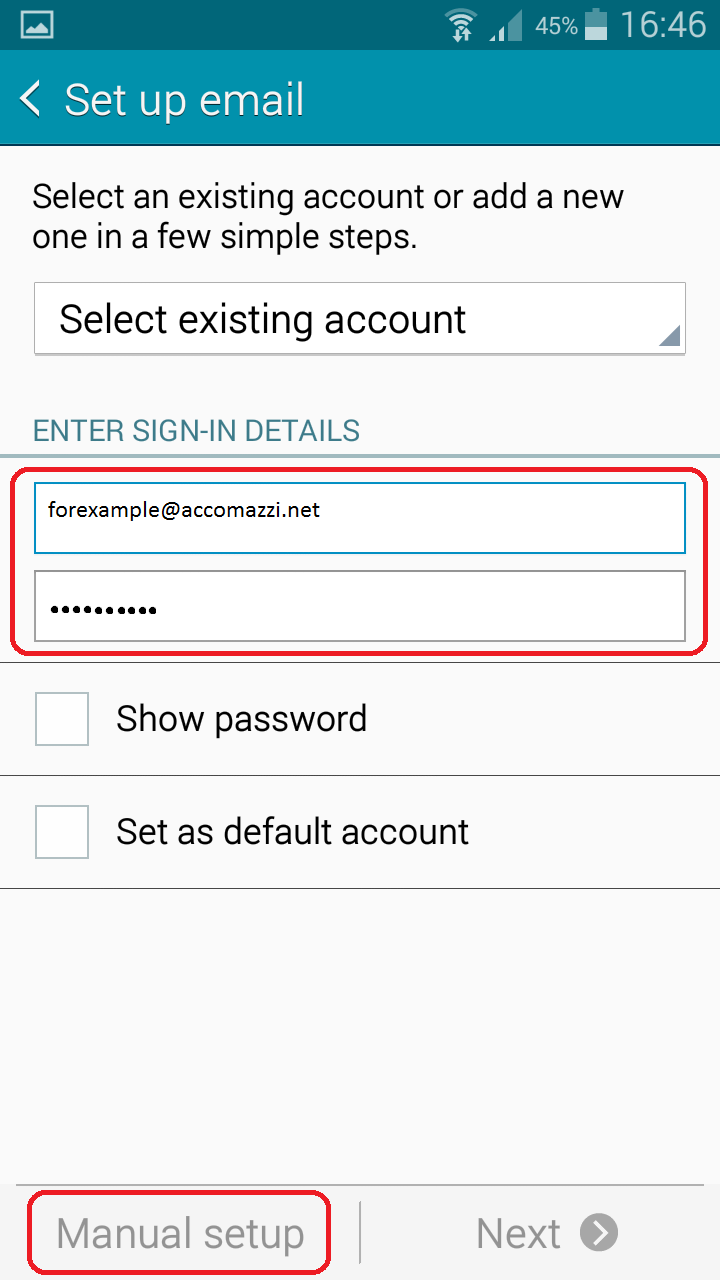
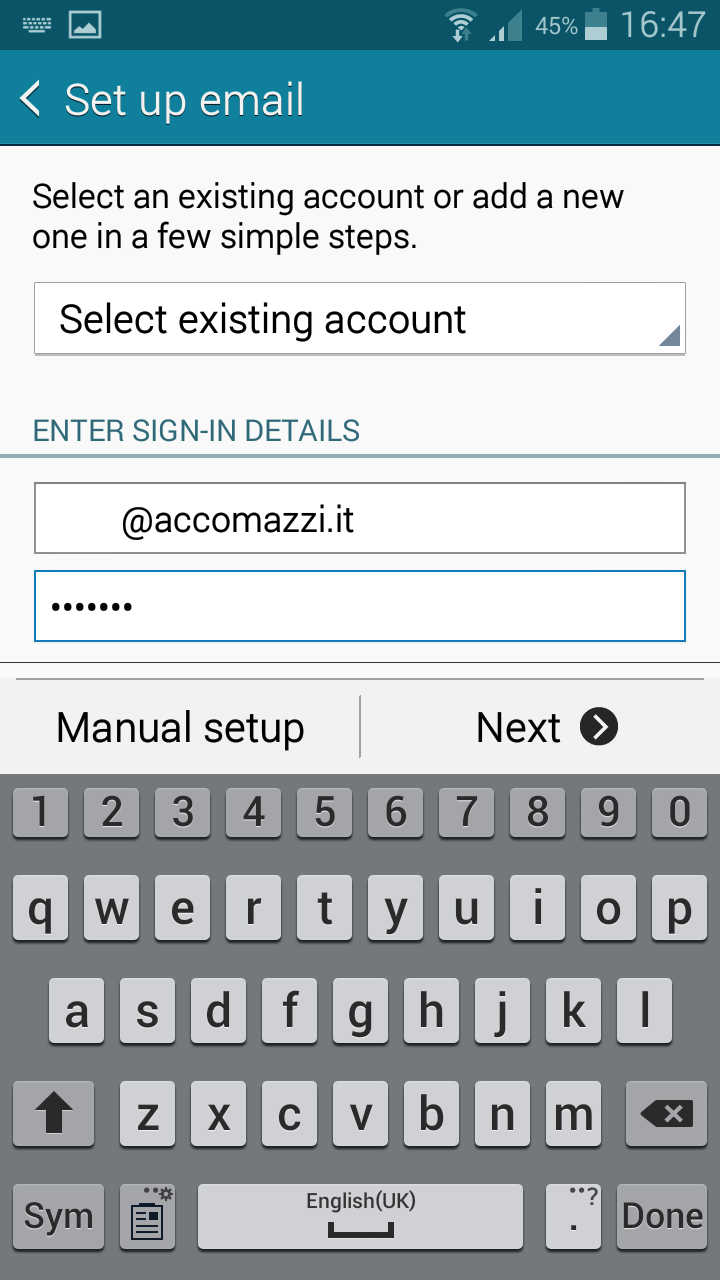
In all cases, now you should be in a screen like the one shown in the photo below on the left…
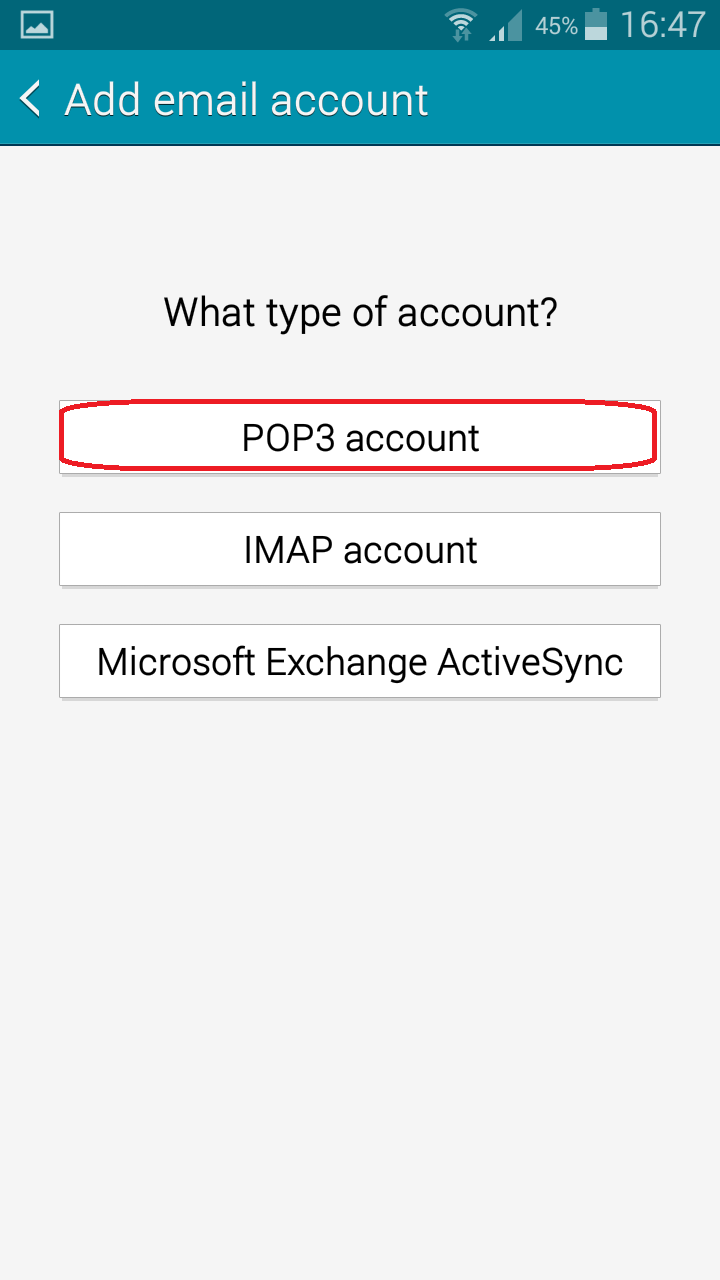
Here you must enter your email and password supplied. Then you have to select "Manual Setup". It will be shown a new screen with three options. You can choose POP3 or IMAP, while we're not exactly in the case of Microsoft Exchange. If you choose POP3 mail will be downloaded on your device and you can manage it from there, while with IMAP, will see the copy on the server. In our example, we will select POP3.
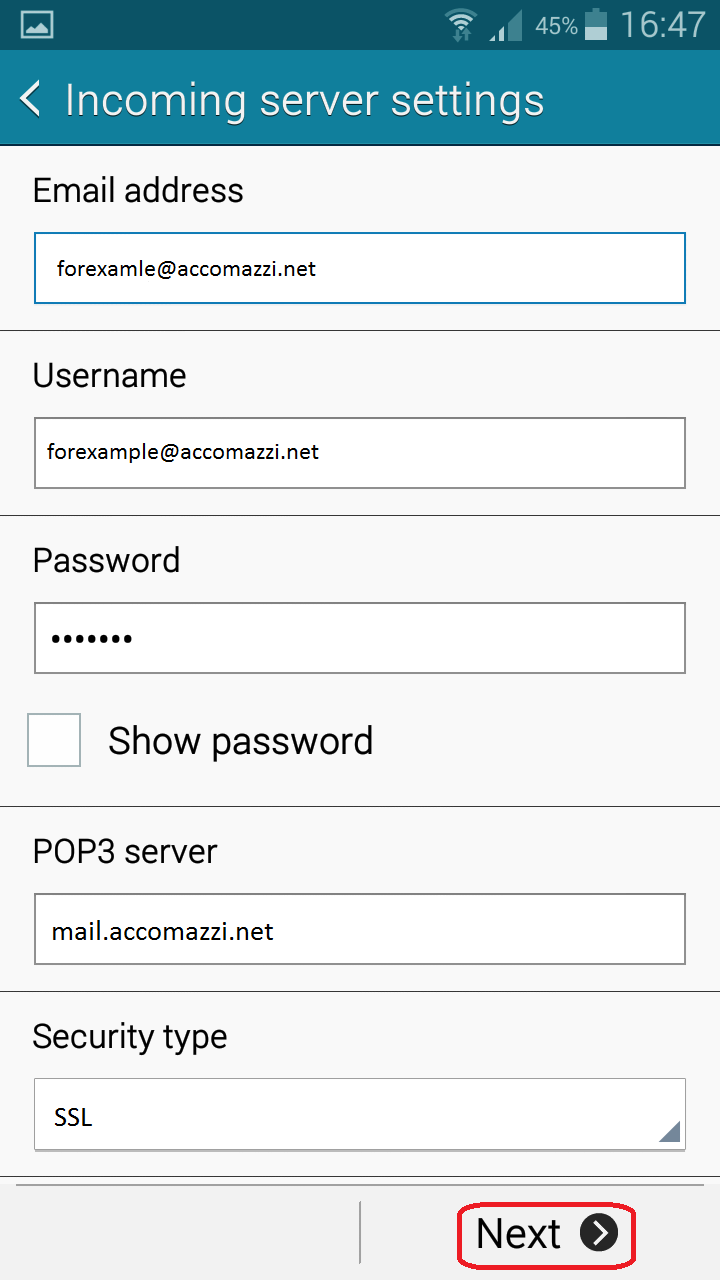
Now it will appear a long form, to be filled armed with patience ... Below the screen:
Replace areas "E-mail" and "password" with the data entered earlier (which, however, probably the program has already memorized), copy your e-mail address in the "User Name", while for the other areas, enter the data shown in the figure. Click on the "Next" button.
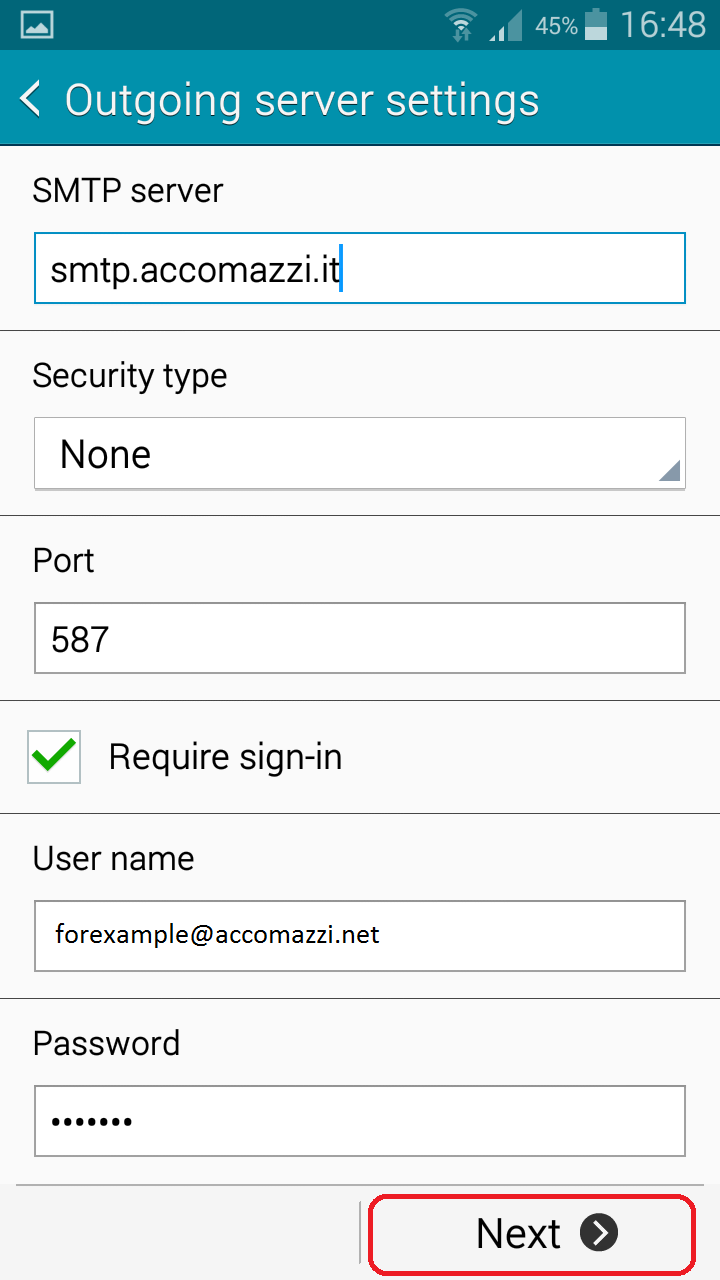
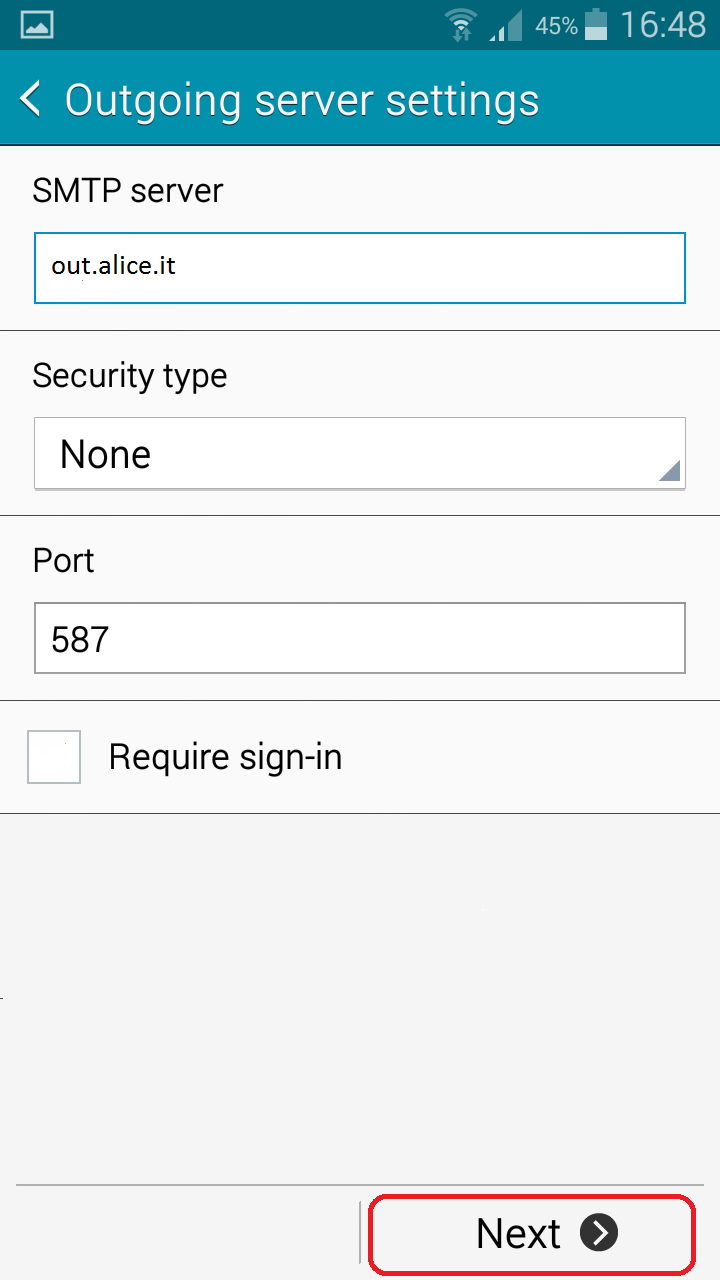
Now we have two possibilities depending on your contract with Accomazzi. If you have an SMTP server with Accomazzi.net look at the picture on the bottom left, otherwise the one on the right.
By checking the box "Require sign-in" you can enter user name and password for the SMTP server (which are not the same entered before, but will be provided in case you have requested SMTP), Otherwise, enter your old provider's server. Click on "next".
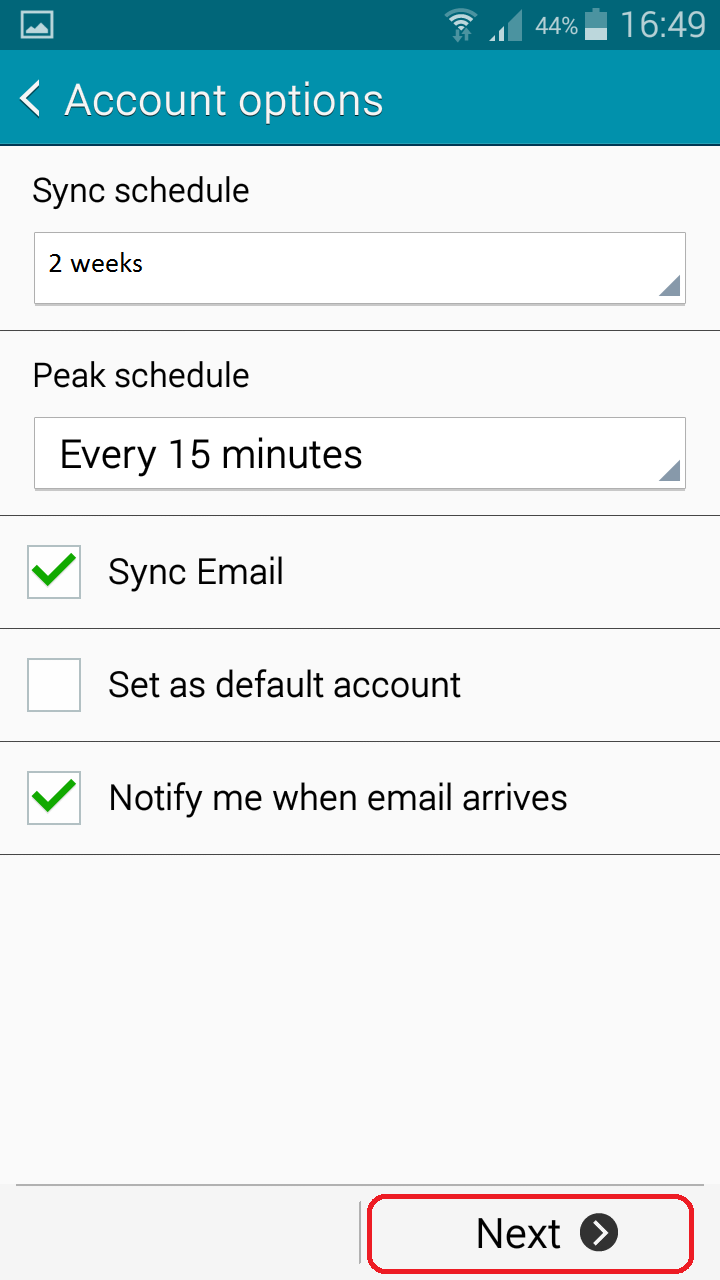
The last two screens are of your choice, depending on your needs. Check "Synchronize e-mail" to immediately start to recover mail already exists (in the period chosen under "period of synchronizing e-mail"). Very useful is also the option that notifies you of e-mail.
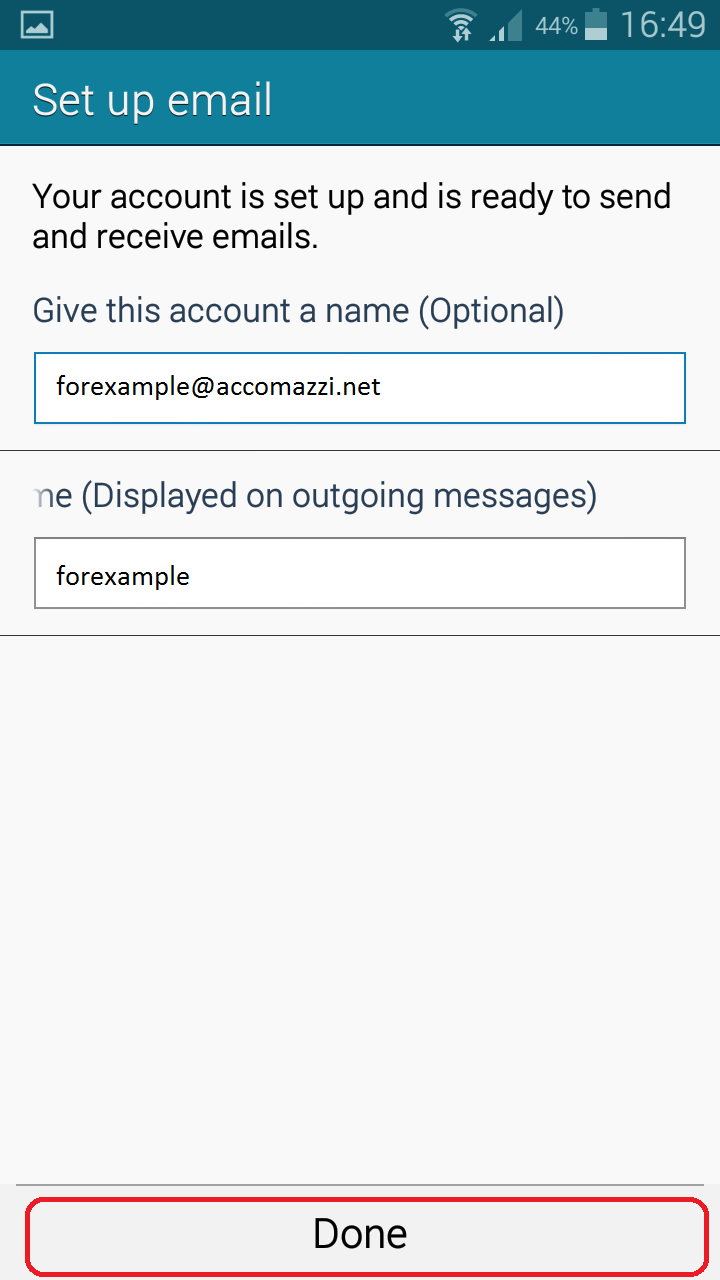
After pressing the "next" we are in another screen where you can enter information of your choice. An account name that will be shown from the app Android (For example, "Mail Work"), and your name will appear as the sender of the mail. Click "Finish". Finally we have configured the mailbox. The program will synchronize the email already present. If they arrive everything is fine, otherwise you must re-check the configuration.